
For a while now, I've been working on just the right stuff to use when scratch-building seat belts. I'm still not totally happy with what I use for the buckle part, but I thought I'd share it with the rest of you in case any of you want to try and add seat belts to your 1:18th scale model.
You will need:
A roll of 1/8th inch (3.17cm) wide craft ribbon available in most craft stores in many different colors.
A blister pack of scrapbooking square studs. The pack I bought has chrome, white and black studs in it. You can find these at most stores that carry scrapbooking supplies.
1/2 inch (1.25mm) aluminum DYMO tape. This stuff is pretty old. I got it back in the eighties so I don't know if they still make it. If you can't find it, you could use very thin aluminum sheet.
Superglue or two sided clear tape.
precision flat blade screwdrivers.
needle nose pliers.
scissors.
small rectagular file.
pin vise.
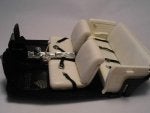
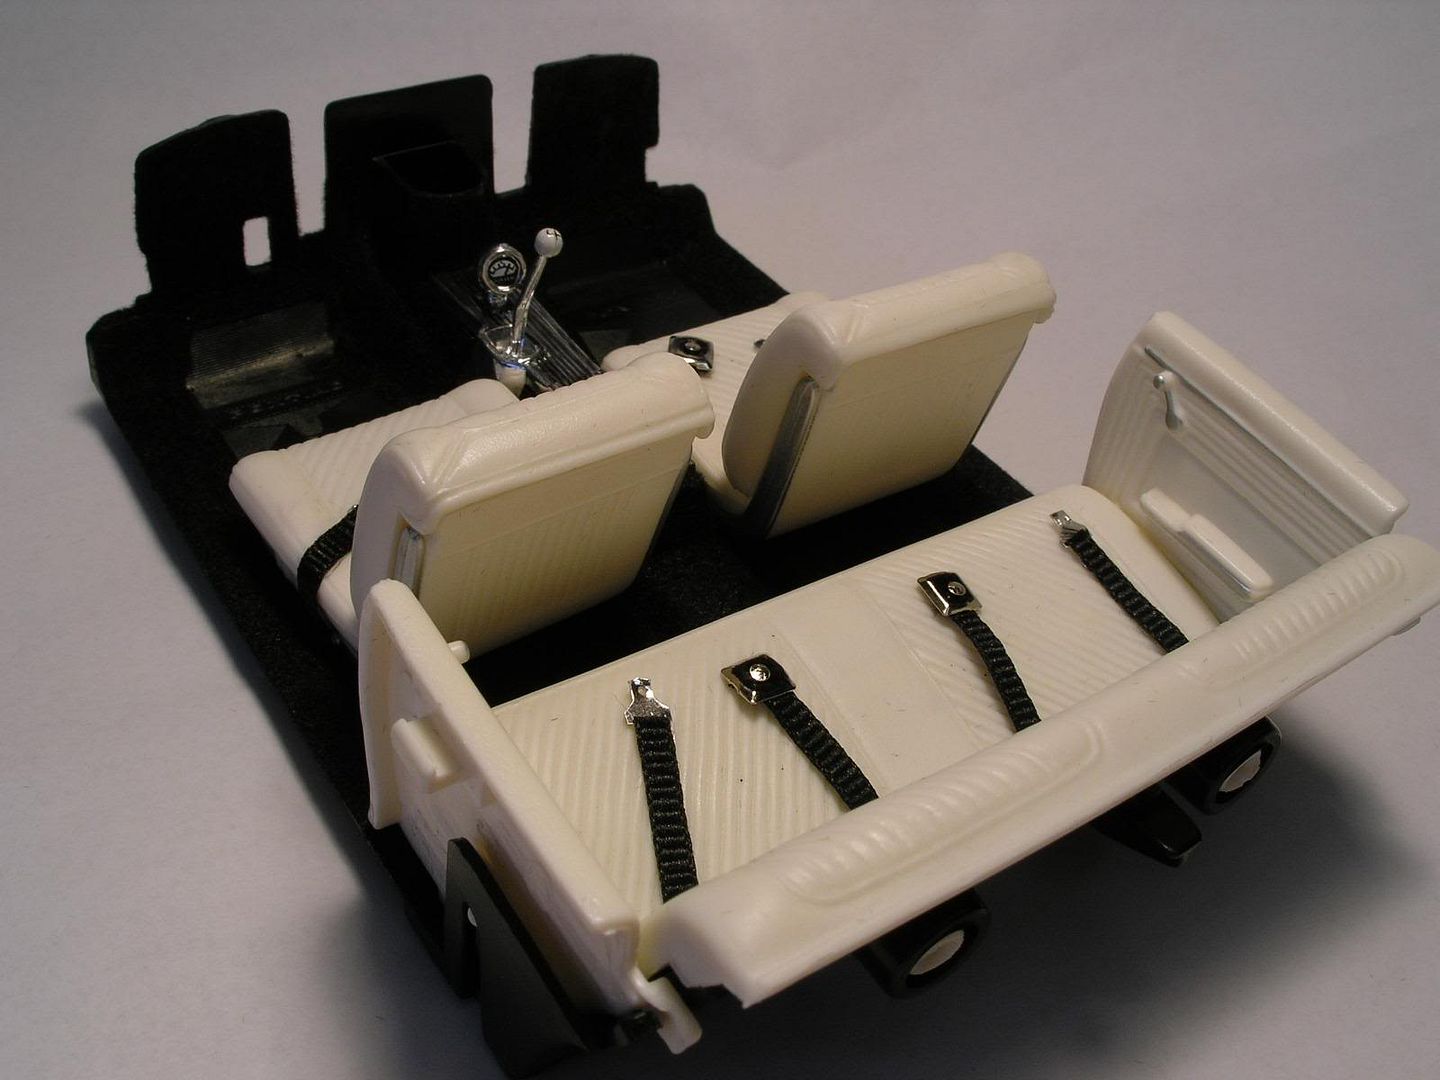
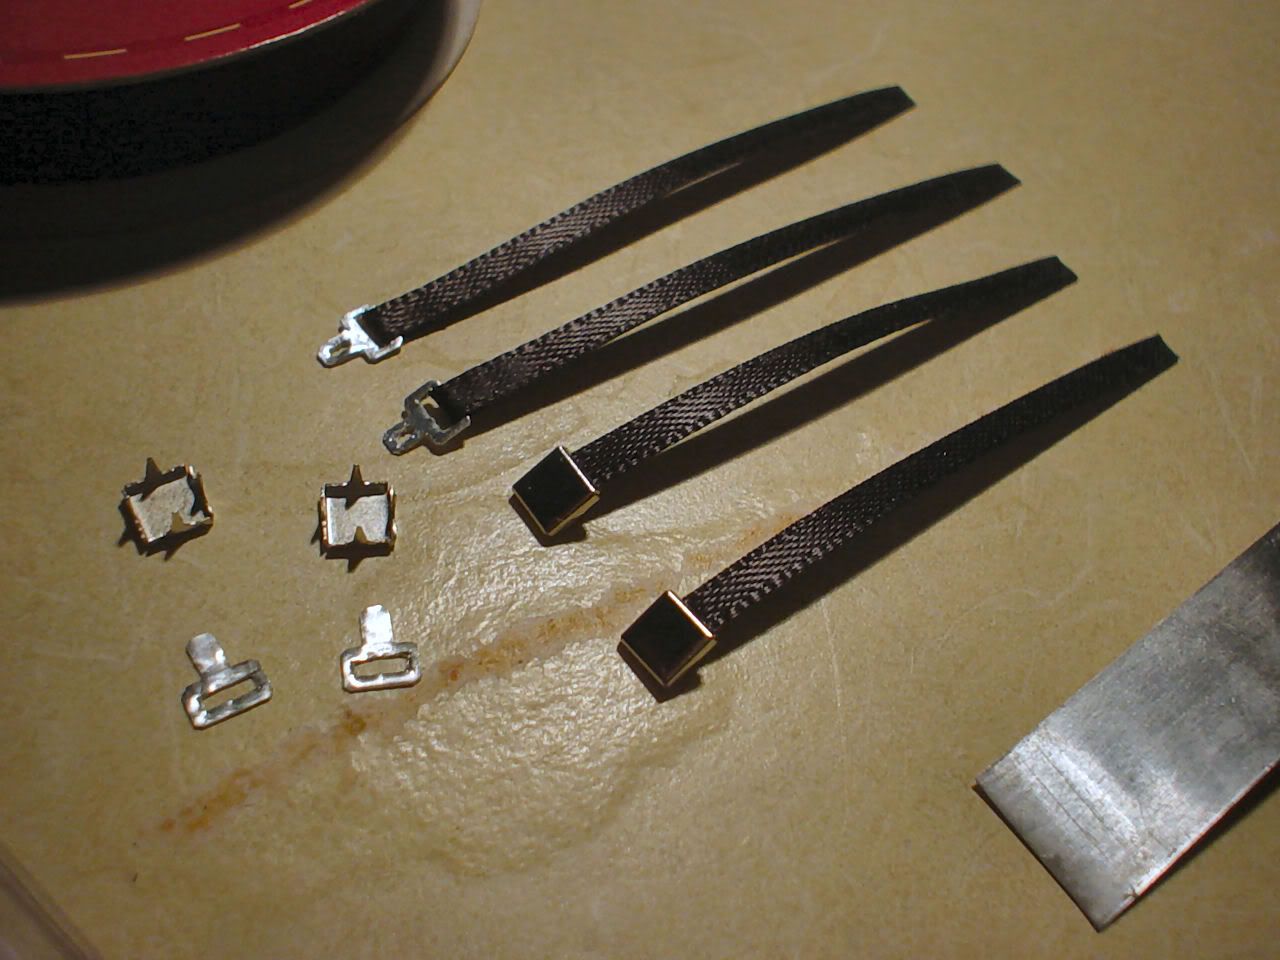
I start out by making the buckle, which isn't as hard as it sounds. I measure out 4 pieces on a piece of DYMO tape, .5mm wide and .6mm long. The hole for the belt is .1mm by .3mm. I cut that out before cutting out the individual buckle pieces using two different sizes of precision flat blade screwdrivers that I have filed down sharp. I drill two holes in the "tongue" portion and use a sharpened screwdriver to trim off the excess inbetween the holes. I then cut out the buckles and chop a small triangular piece off of each corner to make each corner look round. You will probably have to use something to re-flatten them at this point because aluminum is soft and likes to bend. Thread a piece of ribbon through one end of the buckle and use either super glue or two-sided tape on the back to hold the two pieces together. Make sure the pieces are together tightly next to the buckle. Take four square studs and bend one prong down inside each one of them. Lay a piece of ribbon inside the back side and bend the other three prongs down over the ribbon. Now you have four belts with buckles and four belts with latches. For cars with back seats, I turn the interior tub over and where the seat back and seat bottom meet, I file four holes until it just comes through to the inside and then trim 4 small, rectangular holes to slide the belts through, from the inside. Then glue the ends down on the outside of the tub. The buckle portion usually needs something like a very small piece of two-sided clear tape to hold it to the seat so it is not hanging in the air. Attachment for the front belts is going to be different for every car. Shoulder belts could be made the same way. . .
![Image]()
![Image]()
Don't forget to "buckle" up. . . :giggle
You will need:
A roll of 1/8th inch (3.17cm) wide craft ribbon available in most craft stores in many different colors.
A blister pack of scrapbooking square studs. The pack I bought has chrome, white and black studs in it. You can find these at most stores that carry scrapbooking supplies.
1/2 inch (1.25mm) aluminum DYMO tape. This stuff is pretty old. I got it back in the eighties so I don't know if they still make it. If you can't find it, you could use very thin aluminum sheet.
Superglue or two sided clear tape.
precision flat blade screwdrivers.
needle nose pliers.
scissors.
small rectagular file.
pin vise.
I start out by making the buckle, which isn't as hard as it sounds. I measure out 4 pieces on a piece of DYMO tape, .5mm wide and .6mm long. The hole for the belt is .1mm by .3mm. I cut that out before cutting out the individual buckle pieces using two different sizes of precision flat blade screwdrivers that I have filed down sharp. I drill two holes in the "tongue" portion and use a sharpened screwdriver to trim off the excess inbetween the holes. I then cut out the buckles and chop a small triangular piece off of each corner to make each corner look round. You will probably have to use something to re-flatten them at this point because aluminum is soft and likes to bend. Thread a piece of ribbon through one end of the buckle and use either super glue or two-sided tape on the back to hold the two pieces together. Make sure the pieces are together tightly next to the buckle. Take four square studs and bend one prong down inside each one of them. Lay a piece of ribbon inside the back side and bend the other three prongs down over the ribbon. Now you have four belts with buckles and four belts with latches. For cars with back seats, I turn the interior tub over and where the seat back and seat bottom meet, I file four holes until it just comes through to the inside and then trim 4 small, rectangular holes to slide the belts through, from the inside. Then glue the ends down on the outside of the tub. The buckle portion usually needs something like a very small piece of two-sided clear tape to hold it to the seat so it is not hanging in the air. Attachment for the front belts is going to be different for every car. Shoulder belts could be made the same way. . .

Don't forget to "buckle" up. . . :giggle